Picture this: A couple has been browsing your website for 20 minutes, getting lost in your beautiful brand and images. They’re growing more excited about the idea of working with you. With excitement, they fill out your inquiry form.
They hit submit…
And…
…they see a big blank page with a tiny generic thank you message. *womp womp*

This tiny moment – the split second after someone inquires with you – is actually a huge opportunity to elevate your couples’ experience and set the tone for your entire working relationship.
The Missed Opportunity Most Wedding Pros Don’t Even Know About
After couples fill out your website contact form, they’ll get redirected to your CRM’s default thank you page. Whether you’re using Dubsado, HoneyBook, or another system, these default pages are… well, let’s just say they’re not winning any design awards.
If you’re using a Dubsado contact form, your couples will be sent to a page like this, with a generic message in tiny text on a huge blank page:

This goes beyond simply looking unprofessional—it actually makes couples feel uncertain about what happens next. Did their form actually submit? When will they hear back from you? Should they follow up? All the excitement and momentum they had while browsing your site just… fizzles.
Fortunately, learning how to create your own thank you page to replace this one is simple. And I’m going to walk you through exactly how to create a thank you page and get it up and running in less than 30 minutes.

What is a Thank You Page? (or Confirmation Page)
A thank you page is where someone is sent after they fill out your website inquiry form. The example above is a thank you page – it’s just a bad one.
Why Should You Have a Thank You Page?
A thank you page confirms the inquiry submission was successful
Having a thank you page reassurances your potential clients that you got their form. (Because there’s nothing worse than clicking ‘submit’ and wondering if your inquiry *actually* got sent.)
I’ve been on websites where submitting an inquiry makes the same page reload, revealing the same inquiry form – now blank. Was my inquiry submitted or simply erased? Do I have to fill out the form again? I had no idea.
A thank you page allows you to say… well, thank you
You can use this space to express gratitude that a couple is interested in working together. A little gratitude can go a long way in building goodwill, sending a positive brand image, and leaving couples even more excited to hear back from you.
A thank you page tells couples what to expect next
This is a great space to let couples know when they can expect to hear back from you and gives them peace of mind while they wait.
4 Ways a Custom Thank You Page Elevates Your Couples’ Experience
1. It Keeps Your Branding Consistent Throughout Their Journey
Your website is stunning. Your inquiry form matches perfectly. But then couples get dumped onto an afterthought of a blank page? That’s a brand experience killer.
A custom thank you page means your couples stay immersed in your world from the moment they discover your website.
2. It Sets Clear Expectations for Next Steps
One of the quickest ways to elevate your client experience is to eliminate uncertainty. Couples shouldn’t have to wonder if their form actually went through or when they’ll hear back from you.
Simply letting them know when they can expect to hear back from you makes you look incredibly professional and organized.
3. It Keeps Couples Engaged While They Wait to Hear From You
The couples filling out your inquiry form are so excited to work with you – don’t let that momentum die! Keep them engaged with your brand while they wait for your response by inviting them to explore your blog, follow you on Instagram, or subscribe to your newsletter.
4. It Makes You Look Incredibly Professional and Thoughtful
A thoughtful thank you page is one of those small details that signals that you care about every aspect of a couple’s experience with you. Couples can sense the seamless branded experience, and you immediately stand out from your competition as more professional and detail-oriented.
What to Include on Your Thank You Page (3 Essential Elements)
1. Your Branding and Personality
Make sure your brand fonts, colors, and overall vibe are reflected on your thank you page so it feels cohesive with the rest of your website. The tone should match your brand voice – whether that’s warm and romantic, fun and playful, or elegant and sophisticated.
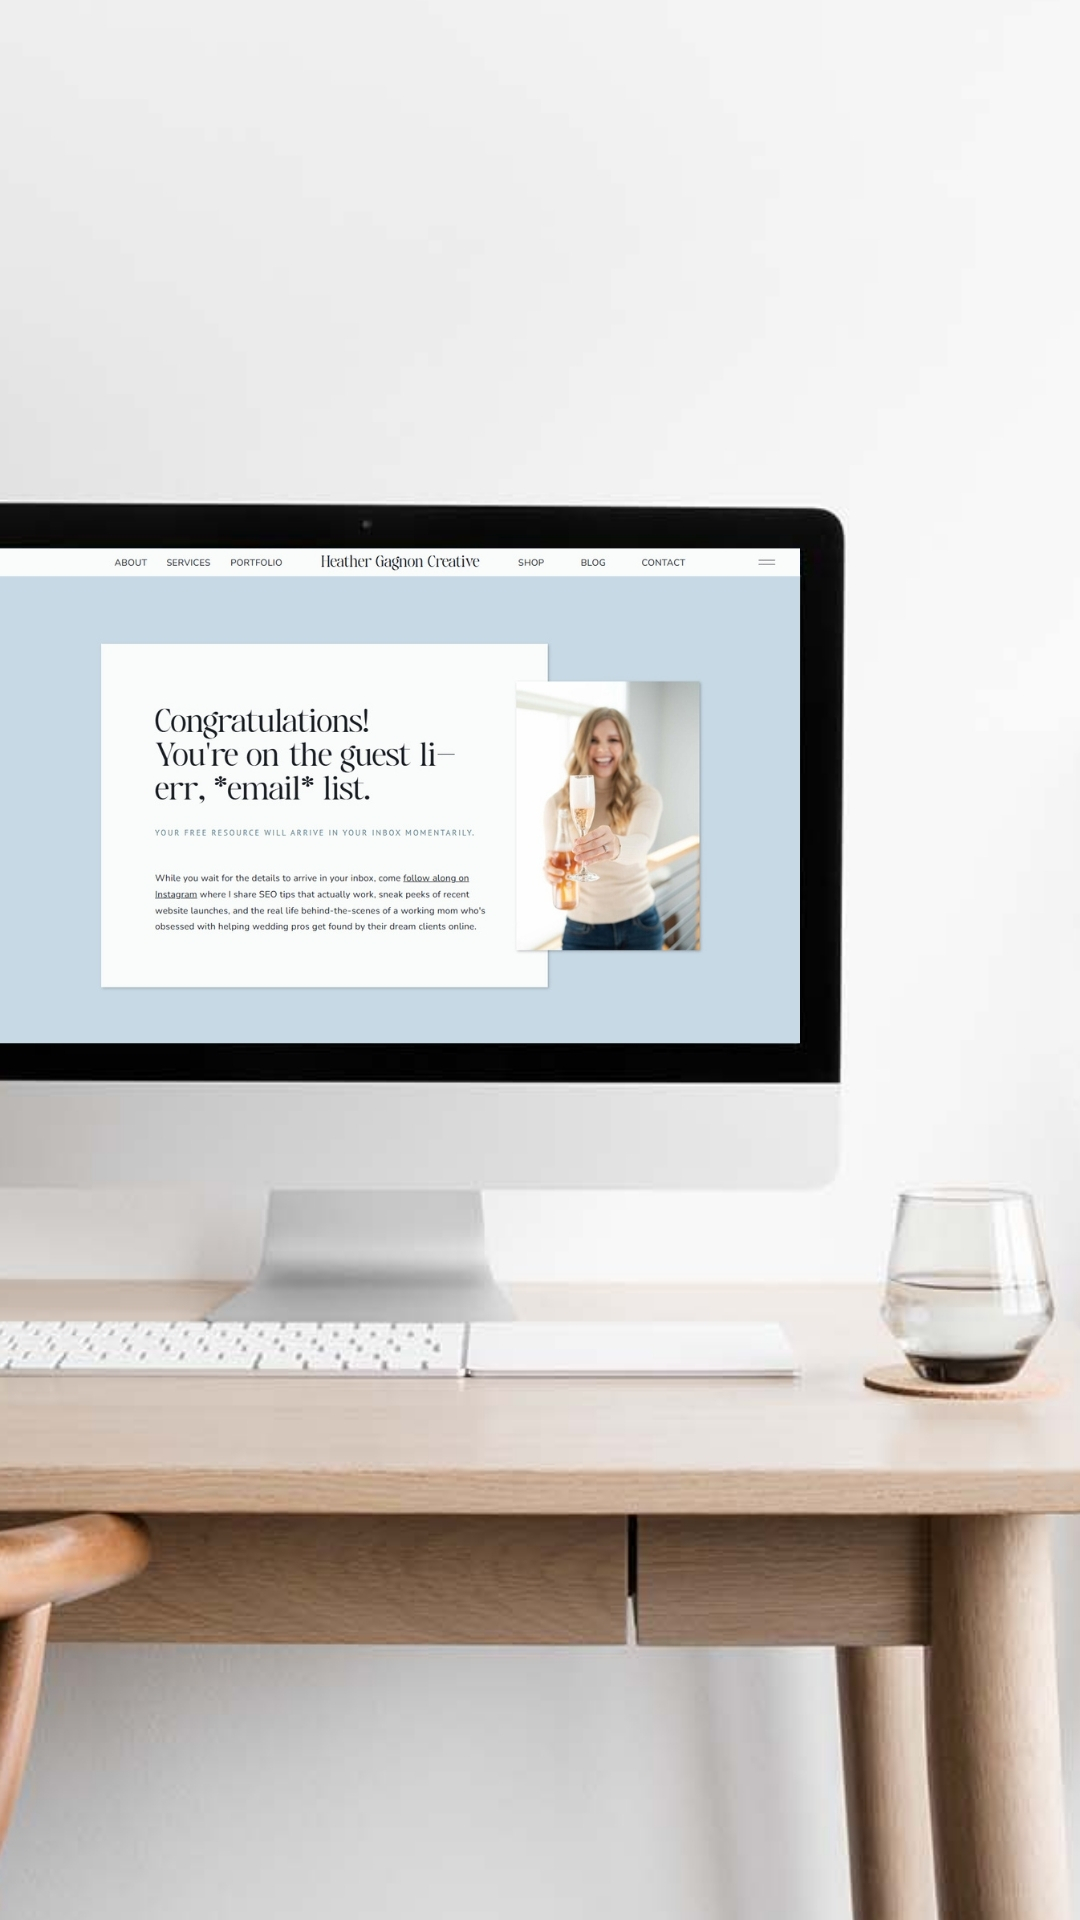
Consider including an image of yourself or your team alongside your message to keep the personal connection strong. This is a great place to use fun, celebratory branding images like raising a glass or popping confetti.
2. Clear Timeline for When They’ll Hear Back
Take your typical response time and add an extra day as a buffer. It’s always better to under-promise and over-deliver! If you usually respond within 24 hours, tell them to expect a response within 2 business days.
Example: “Thanks so much for reaching out! I’ll be getting back to you within 2 business days with all the exciting details about working together.”
3. Content to Keep Them Engaged With Your Brand
You’ve got a couple who’s curious and excited about working with you – hang onto that momentum and give them something valuable to do while they wait to hear back:
- Link to your Instagram where they can see recent weddings and behind-the-scenes content
- Share popular blog posts that answer frequently asked questions about your process
- Offer a freebie like a wedding planning timeline or photography prep guide in exchange for joining your email list
- Showcase recent work with a link to your latest wedding features or favorite galleries
Thank You Page Examples for Wedding Pros
What should I write as my website thank you message?
Here are a few examples of what you can write on you thank you page:
For Photographers:
“Your inquiry just made my day! I can’t wait to learn more about your celebration and share how we can capture every magical moment. I’ll be in touch within 24 hours with all the details. In the meantime, check out [recent wedding] to see what we could create together!”
For Wedding Planners:
“Congratulations on taking the next step toward your dream wedding! Your inquiry is safely in my hands, and I’ll be responding within 2 business days with information about how we can bring your vision to life. While you wait, grab my free wedding timeline checklist to start planning like a pro!”
For Venues:
“Thank you for considering [Venue Name] for your special day! We are excited to be a part of your love story. You will hear from us within 1 business day with our availability and all the details about hosting your celebration here. Take a peek at our latest real wedding to get inspired!”
What does a thank you page look like?
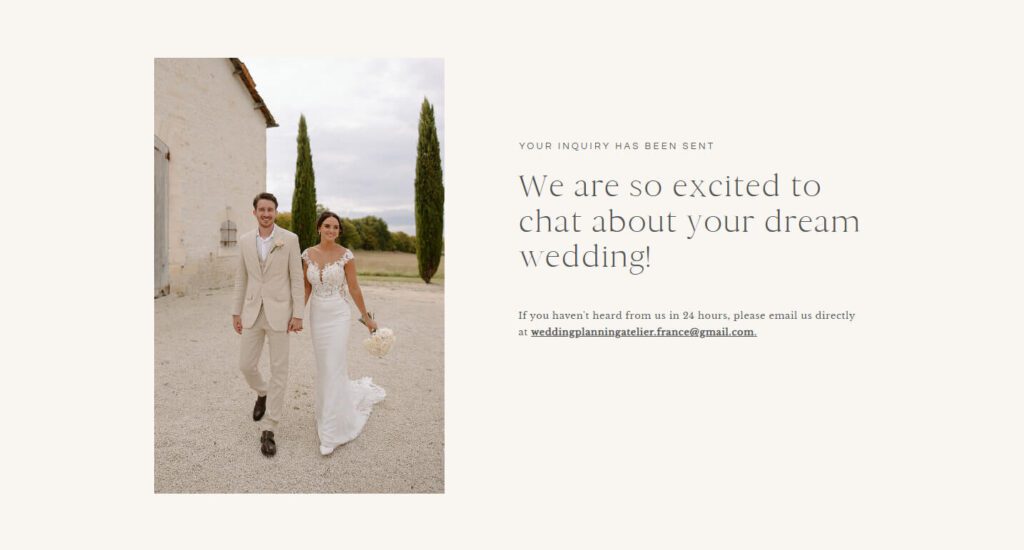
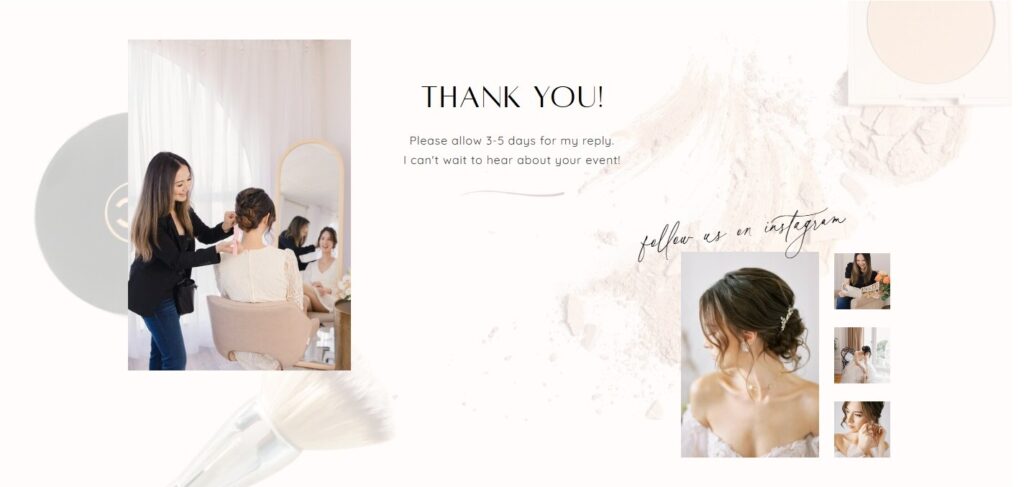
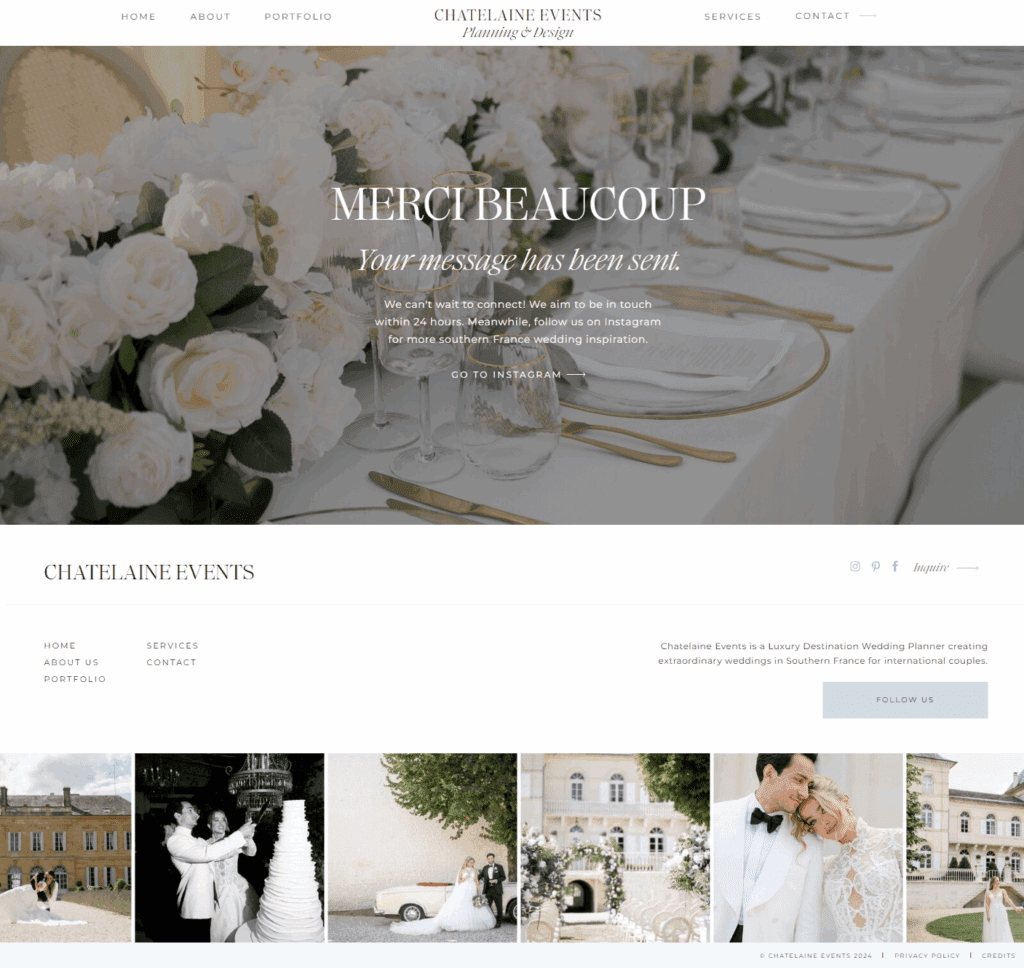
Here are a few examples of thank you pages I’ve designed in Showit. It can be as simple as one canvas with a brief message and image, but you can also add more canvases inviting couples to explore additional content on your website or to follow you on social media.
If you’re feeling stuck, just keep it super simple. Use a solid-colored background, put a big image on one side, and place your text on the other.

How to Create a Thank You Page and Connect it to Your Website Lead Capture Form
Step 1: Create Your Thank You Page in Showit
First, create a new page on your website. On Showit, that’s as simple as opening the website builder and clicking the ‘+’ to add a new blank page. (If your website is on Squarespace or WordPress, follow these same steps.)
Rename the new page “thank you” so it’s easy to remember. And make note of the URL because we’ll need that for Step 2. Any spaces in the page name will convert into dashes, so the URL to a page called ‘thank you’ will be “yourwebsite.com/thank-you”
Step 2: Connect It to Your CRM
For Dubsado 2.0 users:
- Open Dubsado
- Find your website lead capture form under Templates > Forms > Lead Capture
- Click the gear icon to access the form settings
- Paste the URL you saved from your new website thank you page (eg: yourwebsite.com/thank-you) into the the Redirect URL field
- Click the Save Form button
For other CRMs:
Look for “redirect,” “confirmation page,” or “after submission” settings in your form builder.
Step 3: Test It Out
Fill out your own contact form to make sure the redirect works properly and the experience feels seamless.
TLDR: The Smallest Details Matter in the Wedding Industry
A custom thank you page might seem like a small detail, but it’s the small, thoughtful touches that transform good vendors into unforgettable ones. Your couples will feel more confident in their decision to reach out, more excited about potentially working with you, and more impressed with your attention to detail.
The best part? You can set this up in less than 30 minutes and it’ll work for you 24/7, elevating every single inquiry that comes through your website.
Now that you know how to create a thank you page that elevates your client experience, you’ll probably want to:
→ Grab my free website checklist to help you check everything from first-glance design impressions to behind-the-scenes SEO basics so you can feel more confident sending people to your website.
→ Explore website templates for photographers who want to stand out online without starting from scratch.
→ Browse my web design services and let me design your thank you page (or your whole website)!
→ Subscribe to The Love at First Site Newsletter where you’ll get a first look at website launches, recent design crushes, and SEO tips that actually work.


View comments
+ Leave a comment